 There are a lot of things you can do in Office 365 in the web portal to manage your Office 365 environment. However, there are many things you can’t easily do or even do at all from the portal. For those things I use PowerShell. If you haven’t gotten your feet wet with PowerShell yet, this is as good a time as any to get started.
Before I get too deep into this subject I think it’s only fair I tell you there are Modules for SharePoint and Lync for Office that I’m not going to cover. With that being said, when I’m done with you today, you’ll be able to connect to Office 365 for managing Office 365 users and mailboxes.
Let’s get started….
Before you can connect PowerShell with Office 365 to manage it, you’ll need to have a couple of tools installed on your machine. The first tool you’ll want to install is the Microsoft Online Services Sign-In Assistant. Make sure you get the correct version for your OS. Be aware this will make you restart your computer. You can download The Sign-In Assistant here.
Then, you’ll need to install the Azure Active Directory Module for your OS. I have a 64bit computer so I downloaded and installed that, but if you need the 32bit version, make sure you download the correct one. Here are the links:
Once you get the tools installed, you’re going to want to be able to run PowerShell Scripts (and trust me, you’ll see why when we go to log into Office 365). In order to do that, we’re going to need to set the Execution Policy in PowerShell to let you run a script. By default the Execution Policy for PowerShell is restricted, which means it won’t let you run any scripts. There are some options for allowing you to run scripts in PowerShell but I choose unrestricted as it will always ask you if you want to run a script you’ve pulled down from the internet.
To set the Execution Policy, run PowerShell as an administrator. At the Prompt type Get-ExecutionPolicy to see your current Execution Policy. To change it, type Set-ExecutionPolicy Unrestricted and hit Enter.
Now that that’s out of the way, let’s get connected to Office 365. There are a few steps to making the connection you need so I’m going to outline them and then help you automate them!
Open up notepad and copy the code below into it.
# This is a quick way to log into Office 365
Start-transcript
Import-module MSOnline
$Cred = Get-Credential
$Session = New-PSSession -ConfigurationName Microsoft.Exchange -ConnectionUri https://ps.outlook.com/powershell/ -Credential $Cred -Authentication Basic –AllowRedirection
Import-PSSession $Session
connect-msolservice -credential $cred
Now save your file as Login-Office365.ps1. The PS1 file extension denotes that it is a PowerShell script.
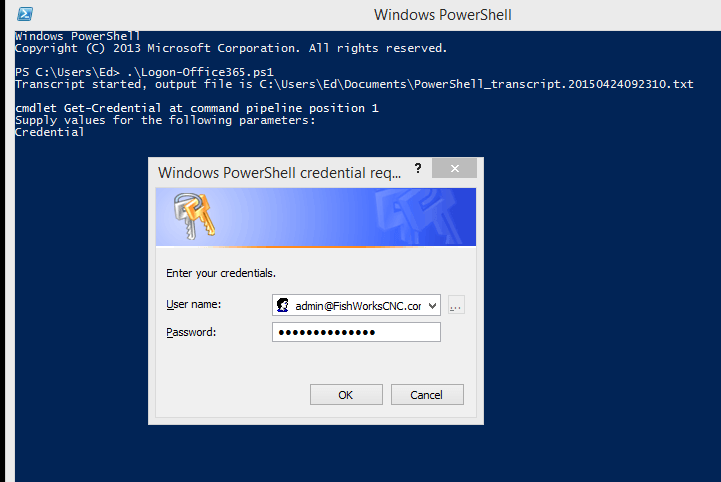
I like to save this script where I can get to it easily. For some folks that might be a folder called Scripts, but I prefer to place them at the root of my user profile so I can get to them easily. When you go to run this script, navigate to the folder where the script is and start typing the name of the script and hit tab it should fill the name in for you. When the script launches it will pop open a box to put your Office 365 Global Admin credentials into it.
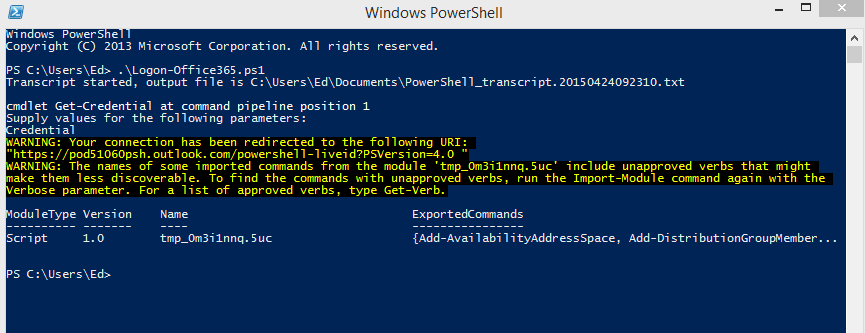
This may take a few minutes connect you but you should see something like this when it’s finished:
Now that you’re connected you will want to try a few commands just to see the results.
We’ll get into other commands at a later date but for now here are a couple for you to play with.
Get-MsolUser
Get-MsolCompanyInformation
Get-Mailbox
Here’s a fun one:
Get-mobiledevice | FL UserDisplayname, Devicetype, friendlyname, name
A quick word of warning: until you get familiar with using PowerShell, stick to Get Commands like the ones above. Later you’ll start using the Set command, but for now keep it simple!
Useful References
Execution Policies in PowerShell
Windows PowerShell for cmdlets for Office 365


