The FortiGate login banner is a great way of explicitly asking users if they are authorized to log in, display legal terms, or simply show a message to users when they log in, such as “Don’t forget to back up the configuration!”, etc.
In FortiGate, login banners are very easy to write and enable. There are just a few options that need tweaking.
The banner can be modified by going to:
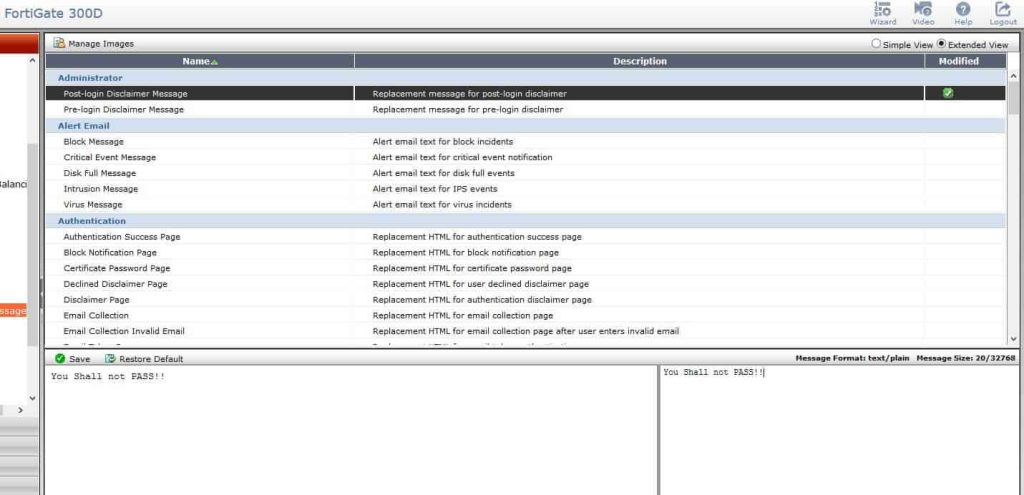
System –> Config –> Replacement Message
From there, select the extended view at the top right, and then you will see the login banner, both pre-login-banner and post-login-banner. Obviously, the pre-login-banner is shown before the user logs in, post-login-banner is shown after. Their messages can differ. As always, after you modify the message, remember to save.
Switch to extended:
What it looks like when editing the banner:
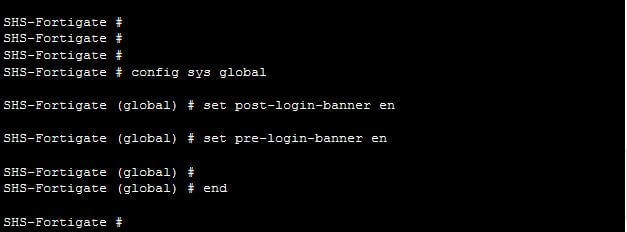
Now, enable the banner to show in CLI. To do this, modify the global settings.
Now the banner will prompt.
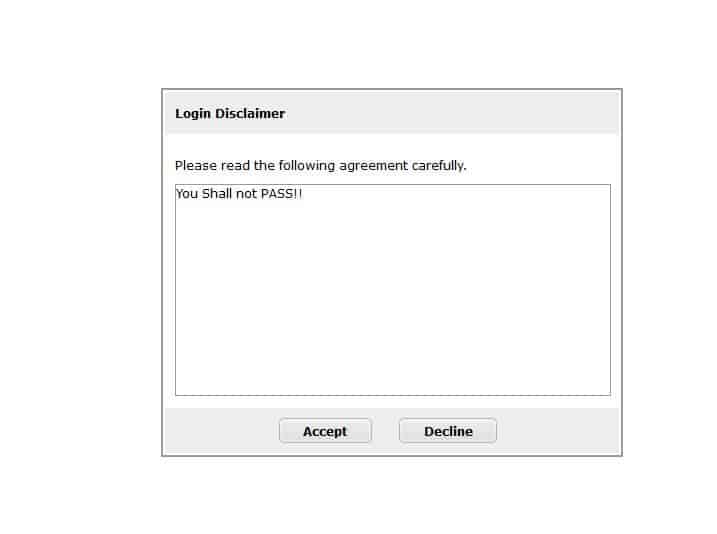
If pre-login-banner is enabled, it will show as soon as you go to the page to login, before you even get prompted to log in. Post-login-banner will prompt after login. This is what the banner looks like:

There you have it! Very simple to set up yet a powerful tool for some organizations.


