I’ve had a few clients set up Office 365 DirSync and the default domain for the users ended up being domainname.onmicrosoft.com instead of the defined default domain in Office 365. It would not allow even the Office 365 administrator to change the email addresses of individual users from the Office 365 console.
The reason is, with Active Directory (AD) synchronization enabled by default, it uses the proxy address field of the user sent from AD. If that is blank in AD it will use domainname.onmicrosoft.com.
If you try to manually populate it in AD, it won’t work.
There are two ways to address this problem. You can either use ADSIedit to modify the proxy address fields individually for each user, or you can use a PowerShell script and .csv file to do it in bulk.
Using ADSIedit
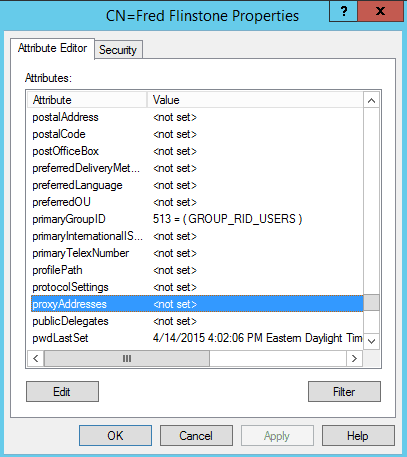
Before making any changes:
Note: to see the proxyAddresses field, make sure that you do not have the “Show only attributes that have values” filter enabled when viewing the object.
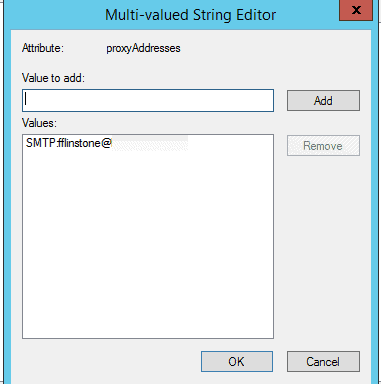
The populated proxyAddresses value:
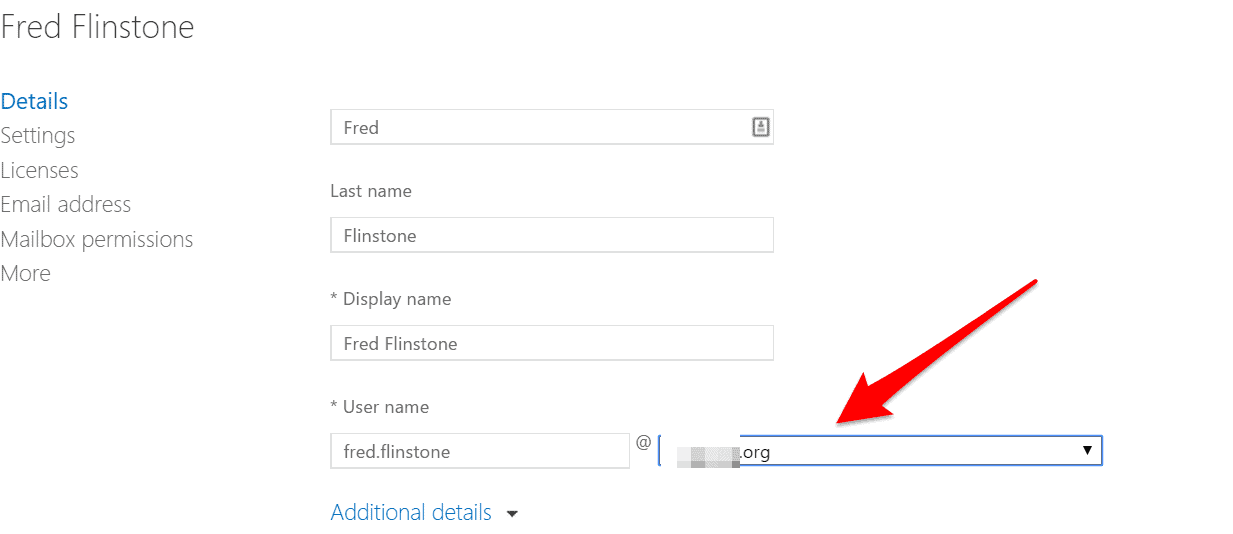
SMTP in all caps denotes primary SMTP, lower case denotes secondary SMTP. After AD Sync happens, Office 365 will now let you change the user name on the settings screen:
You’ll see this warning:
Using Excel and PowerShell
Note: it will overwrite any existing proxyaddresses, not just SMTP: (primary). It will also remove SMTP: (aliases) if you run it as is. Additionally, if your “user logon name” does not match your “user logon name (Pre-Windows 2000)”, it will fail.
Create an Excel file with the following fields and export to a .csv called “c:\mailboxlist.csv”.
| name | ProxyAddress |
| kevin.oppihle | SMTP:kevin.oppihle@domainname.com |
Create a .txt file and input the following
$users=import-csv C:\mailboxlist.csv
foreach($user in $users){
$u = Get-ADUser $user.name -Properties mail,department,ProxyAddresses
$u.ProxyAddresses = $user.ProxyAddress
Set-ADUser -instance $u
}
Save the file as “proxyemail.ps1”.
Open PowerShell as an administrator on your local AD server and run:
./proxyemail.ps1
You can then use ADSIedit to confirm the proxy addresses were assigned to the users.
With the next DirSync process, the updates should push to Office 365.
Here’s what the user will look like in Office 365 now:


